New Columbian jaws are just not available and if they were you still have some issues in fitting them. I have made several and found the same issue’s with each replacement. Let’s start by how you get them off. I have found that driving the three pines up from the bottom is the way to go.
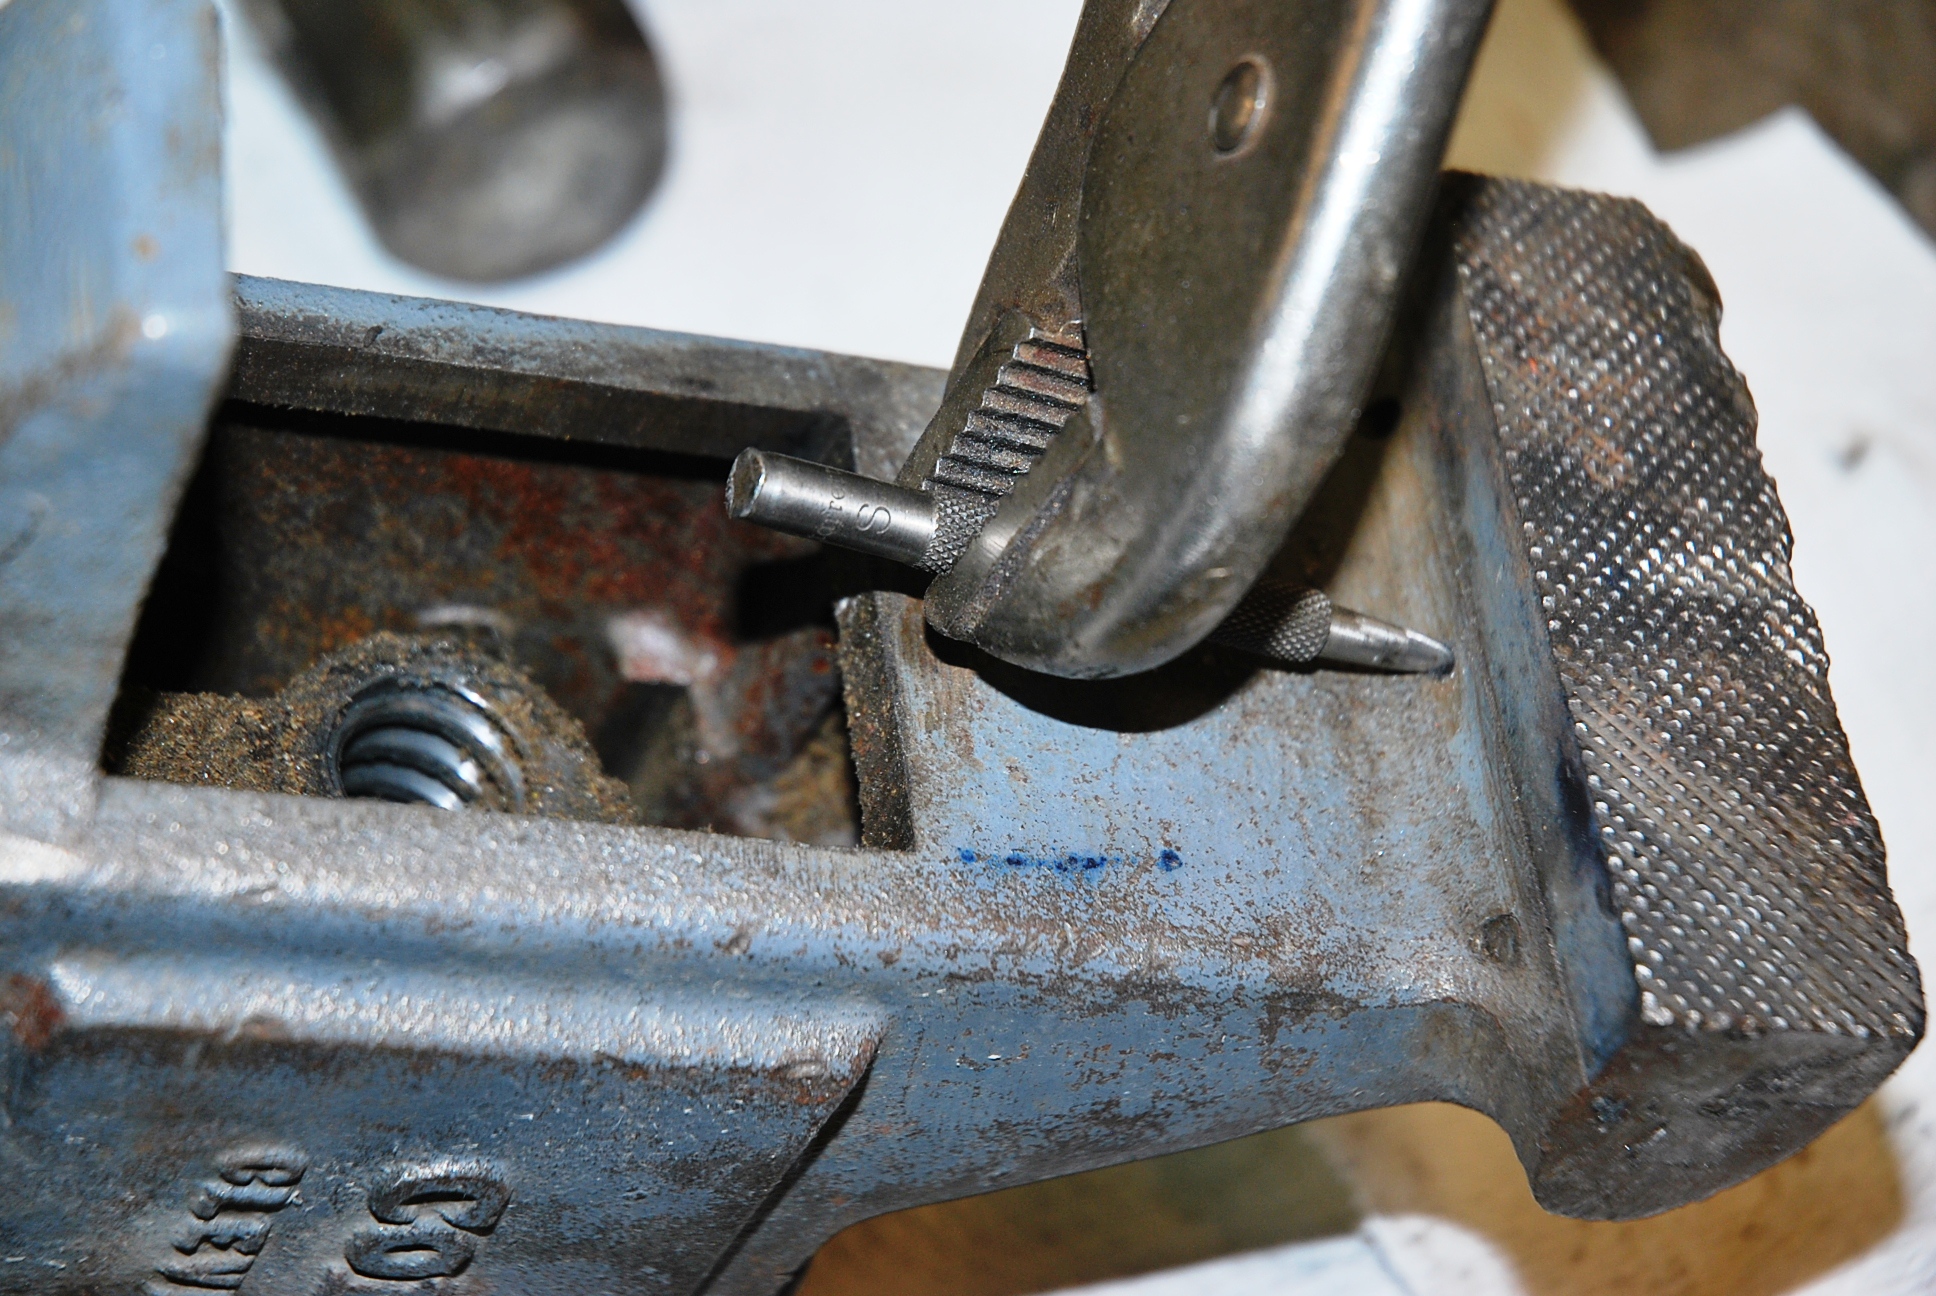
After driving the pins up I then to make it easy for me to pull the pins out I TIG weld a home made slide hammer fixtured to a vertical plate for easy welding. They pull out easy with the slide hammer.


Once the jaws are freed then mark which jaw support it came from for later in case you don’t need to machine the vise. They are a good reference for coping.
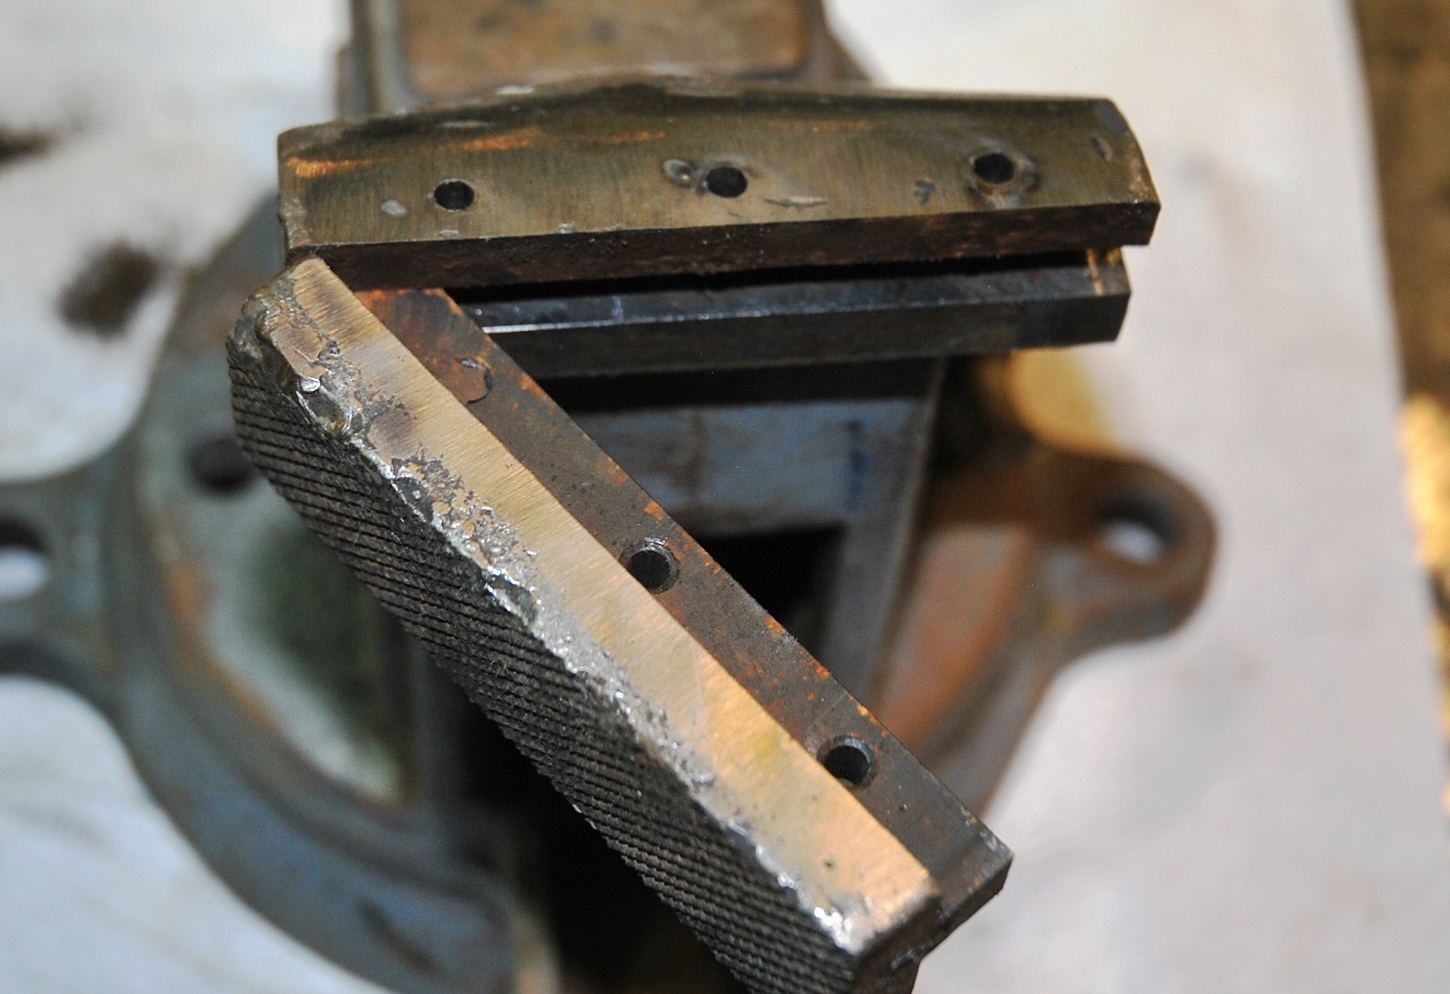
Before making the jaws I like to go through the vise and see how accurate the jaw support is. I have found over time or maybe when it was first built that the support was not true. I would take a file and check the face of the support to see how flat it was, you want this area flat and parallel to the back of the Tee slot area so that the jaws are supported and backed up in the two areas.

After seeing this pattern from filing I would set the vise up on the mill and align the back of the slot parallel then re machine the jaw support face.

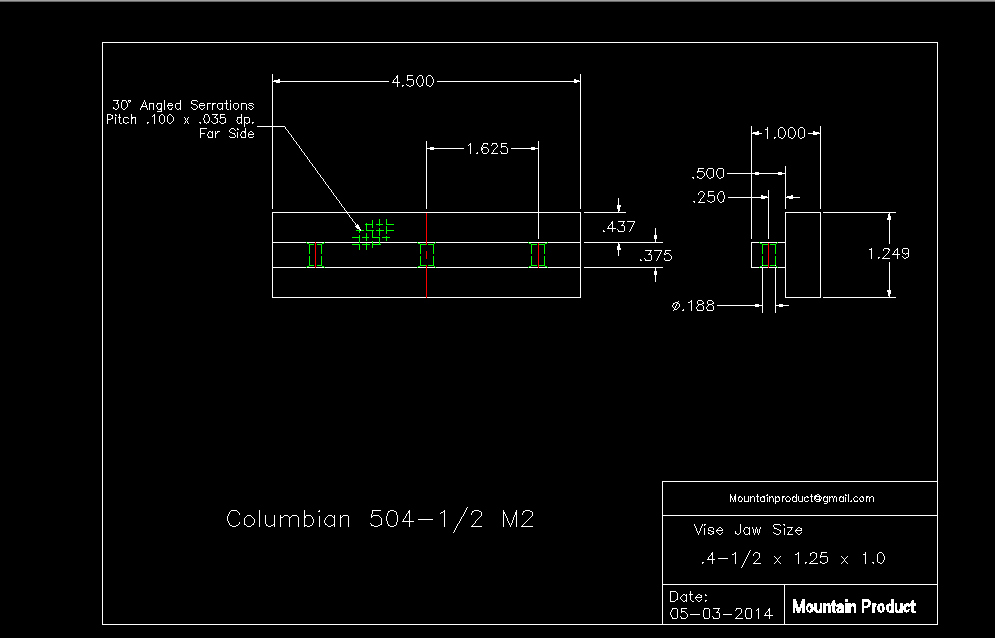
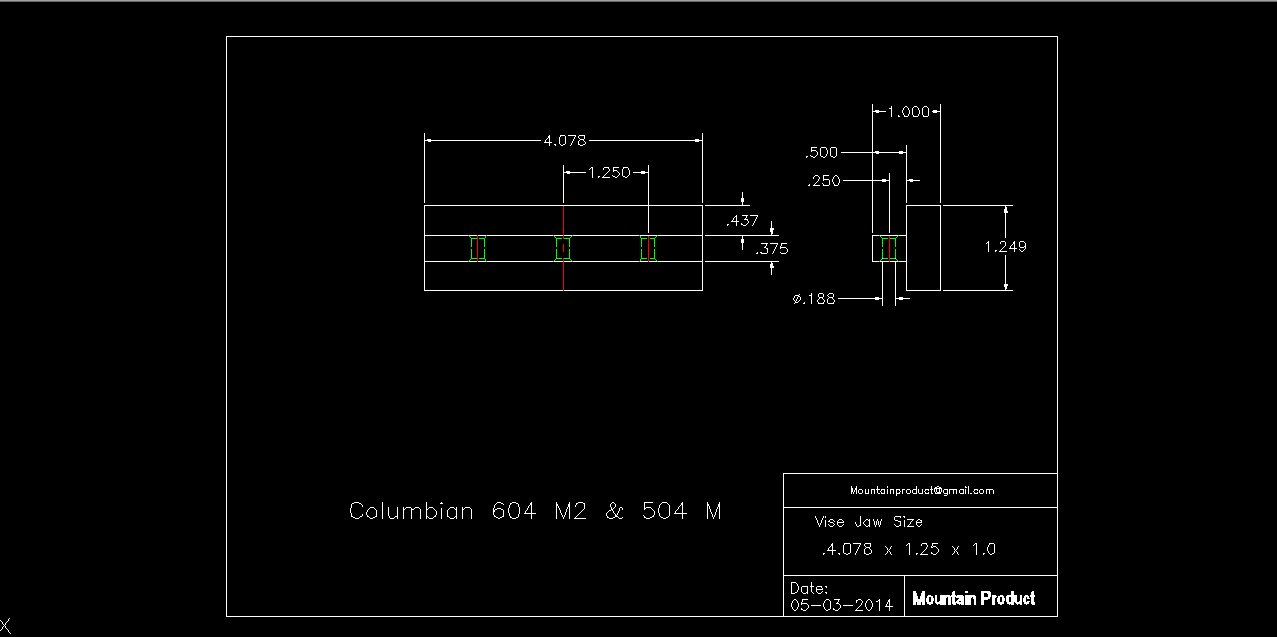
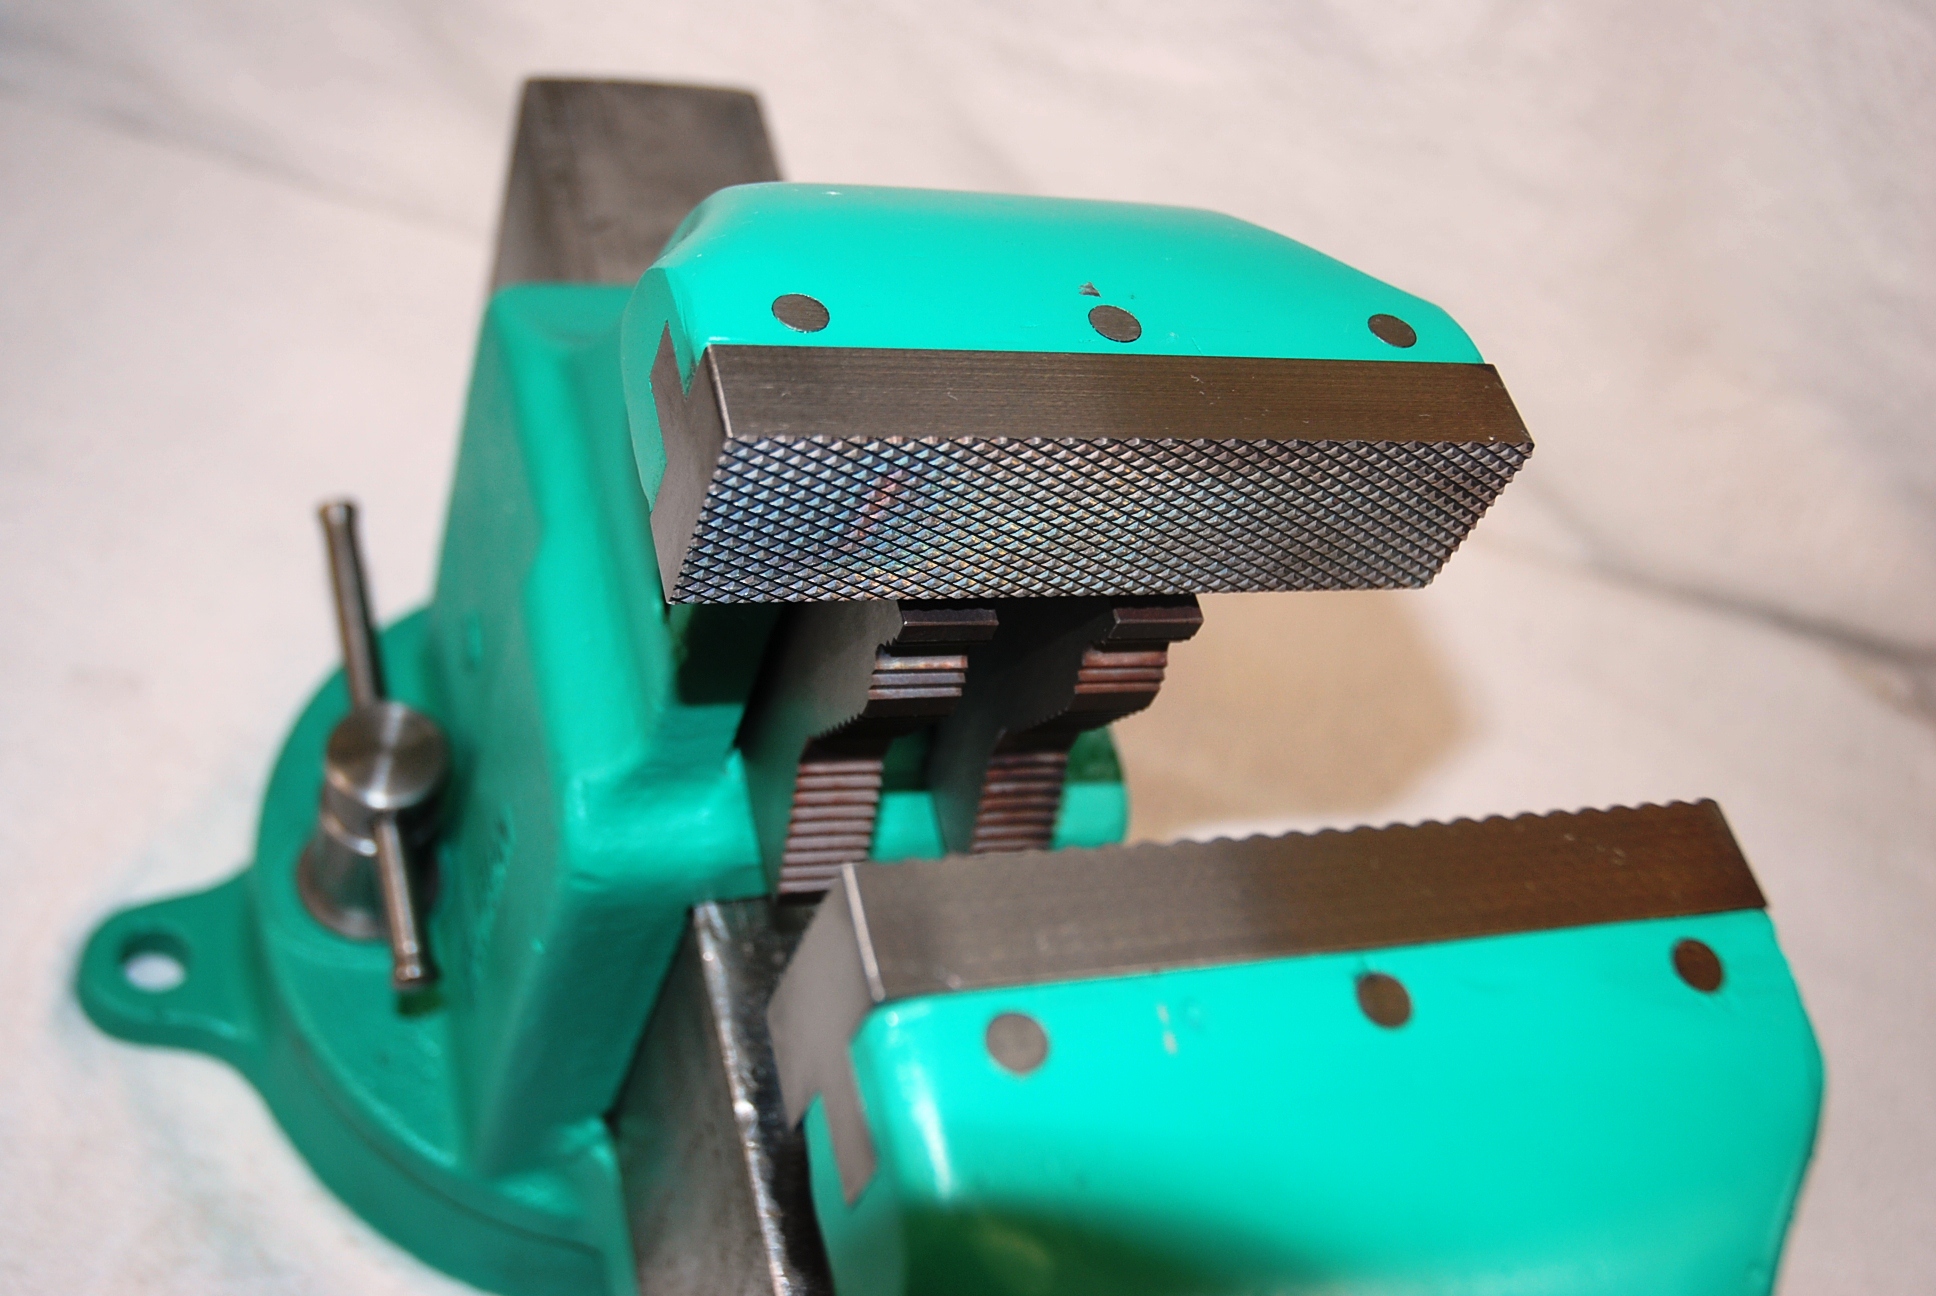
After getting the vise cleaned up to accept new jaws then you are ready for fabricating the jaws. I like to use A2 Tool Steel. Using air hardening Tool Steel means that the distortion rate is minimal to none after heat treat, they won’t twist and the hole locations are the same as it came off the milling machine. Here are the drawings of the jaws I built and use them as a reference for the hole locations and thickness of the tang. These are not all the Tee style jaws Columbian makes but all that I had. Here is a link to a spreadsheet I have been working on since 2017 that would have the Columbian vises with tee style jaws. Click HERE.
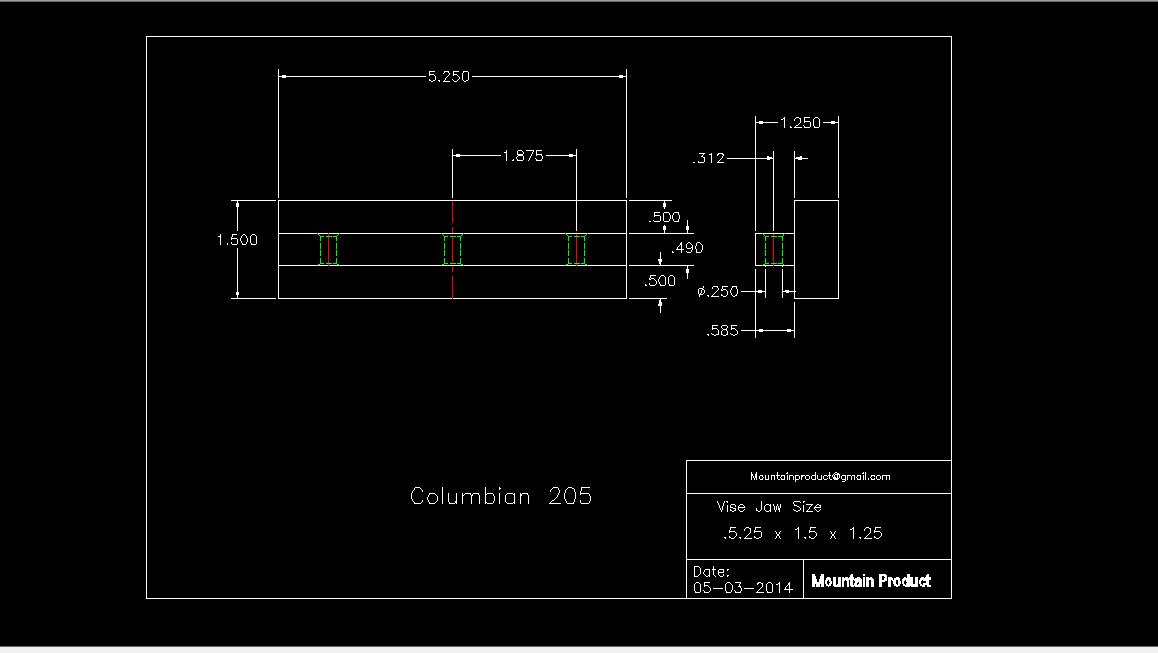
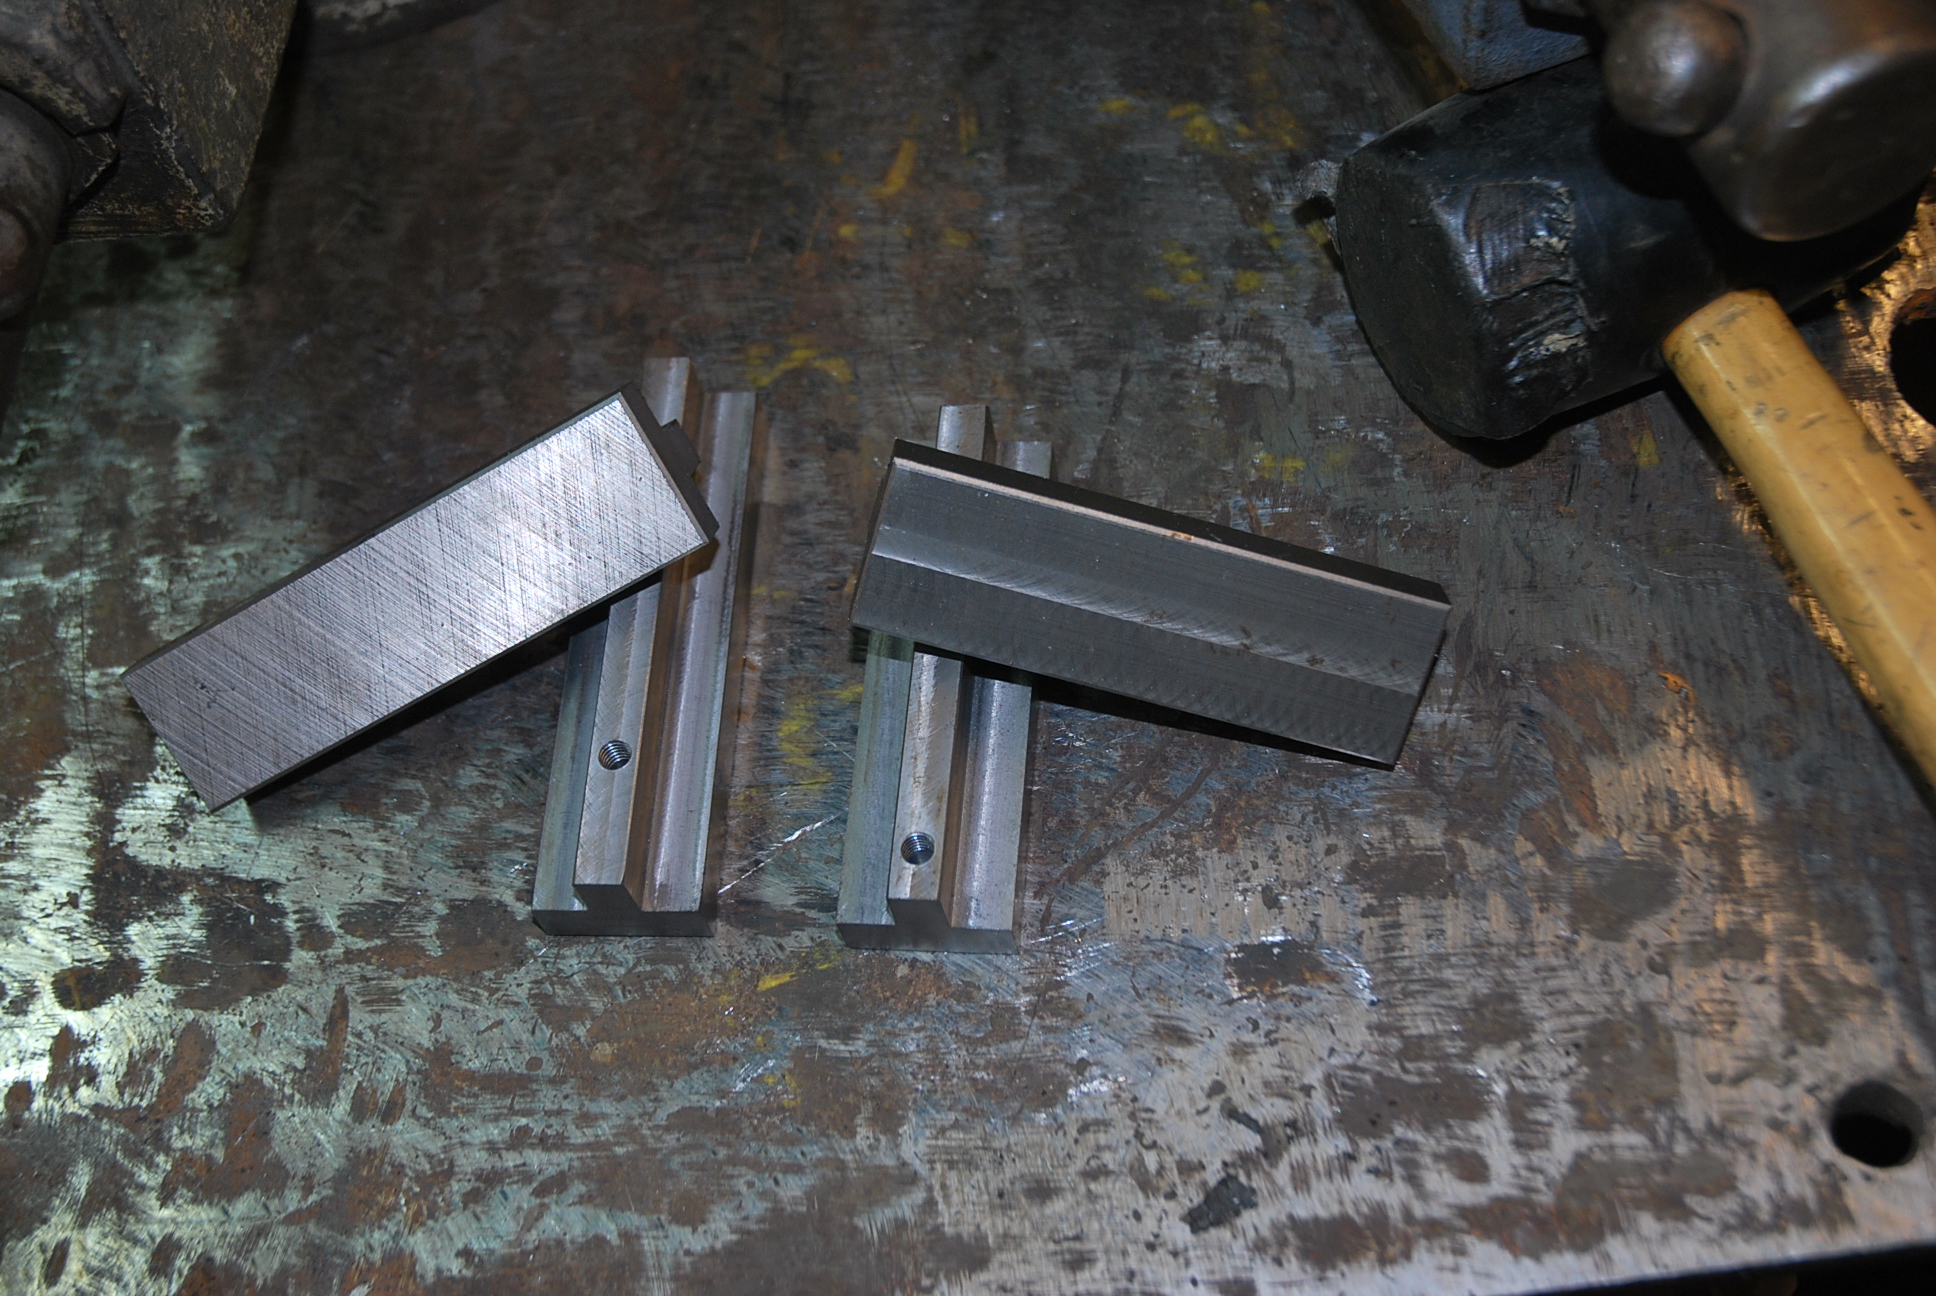
I used A2 Tool Steel when fabricating the jaws, I like to add extra stock on the tops so you can true the jaws to each other when drilling the three pin holes. Hit the finished numbers for the Tee area and give it a couple thousands of slip fit. When I built the Tee jaws I added two threaded holes in the back side of the Tee area so I could bolt it to a fixture plate to serrate the jaw face. These jaws takes time to build and the tool steel is not cheap. The main reason I did not support these jaws were all the complaints when I mentioned the cost. The steel alone was over $40 bucks.
The fixture plate is counter-bored for socket head cap screws on the back side. The plate has to come off and the jaws rotated the 30 degrees then re attached to the angle plate.
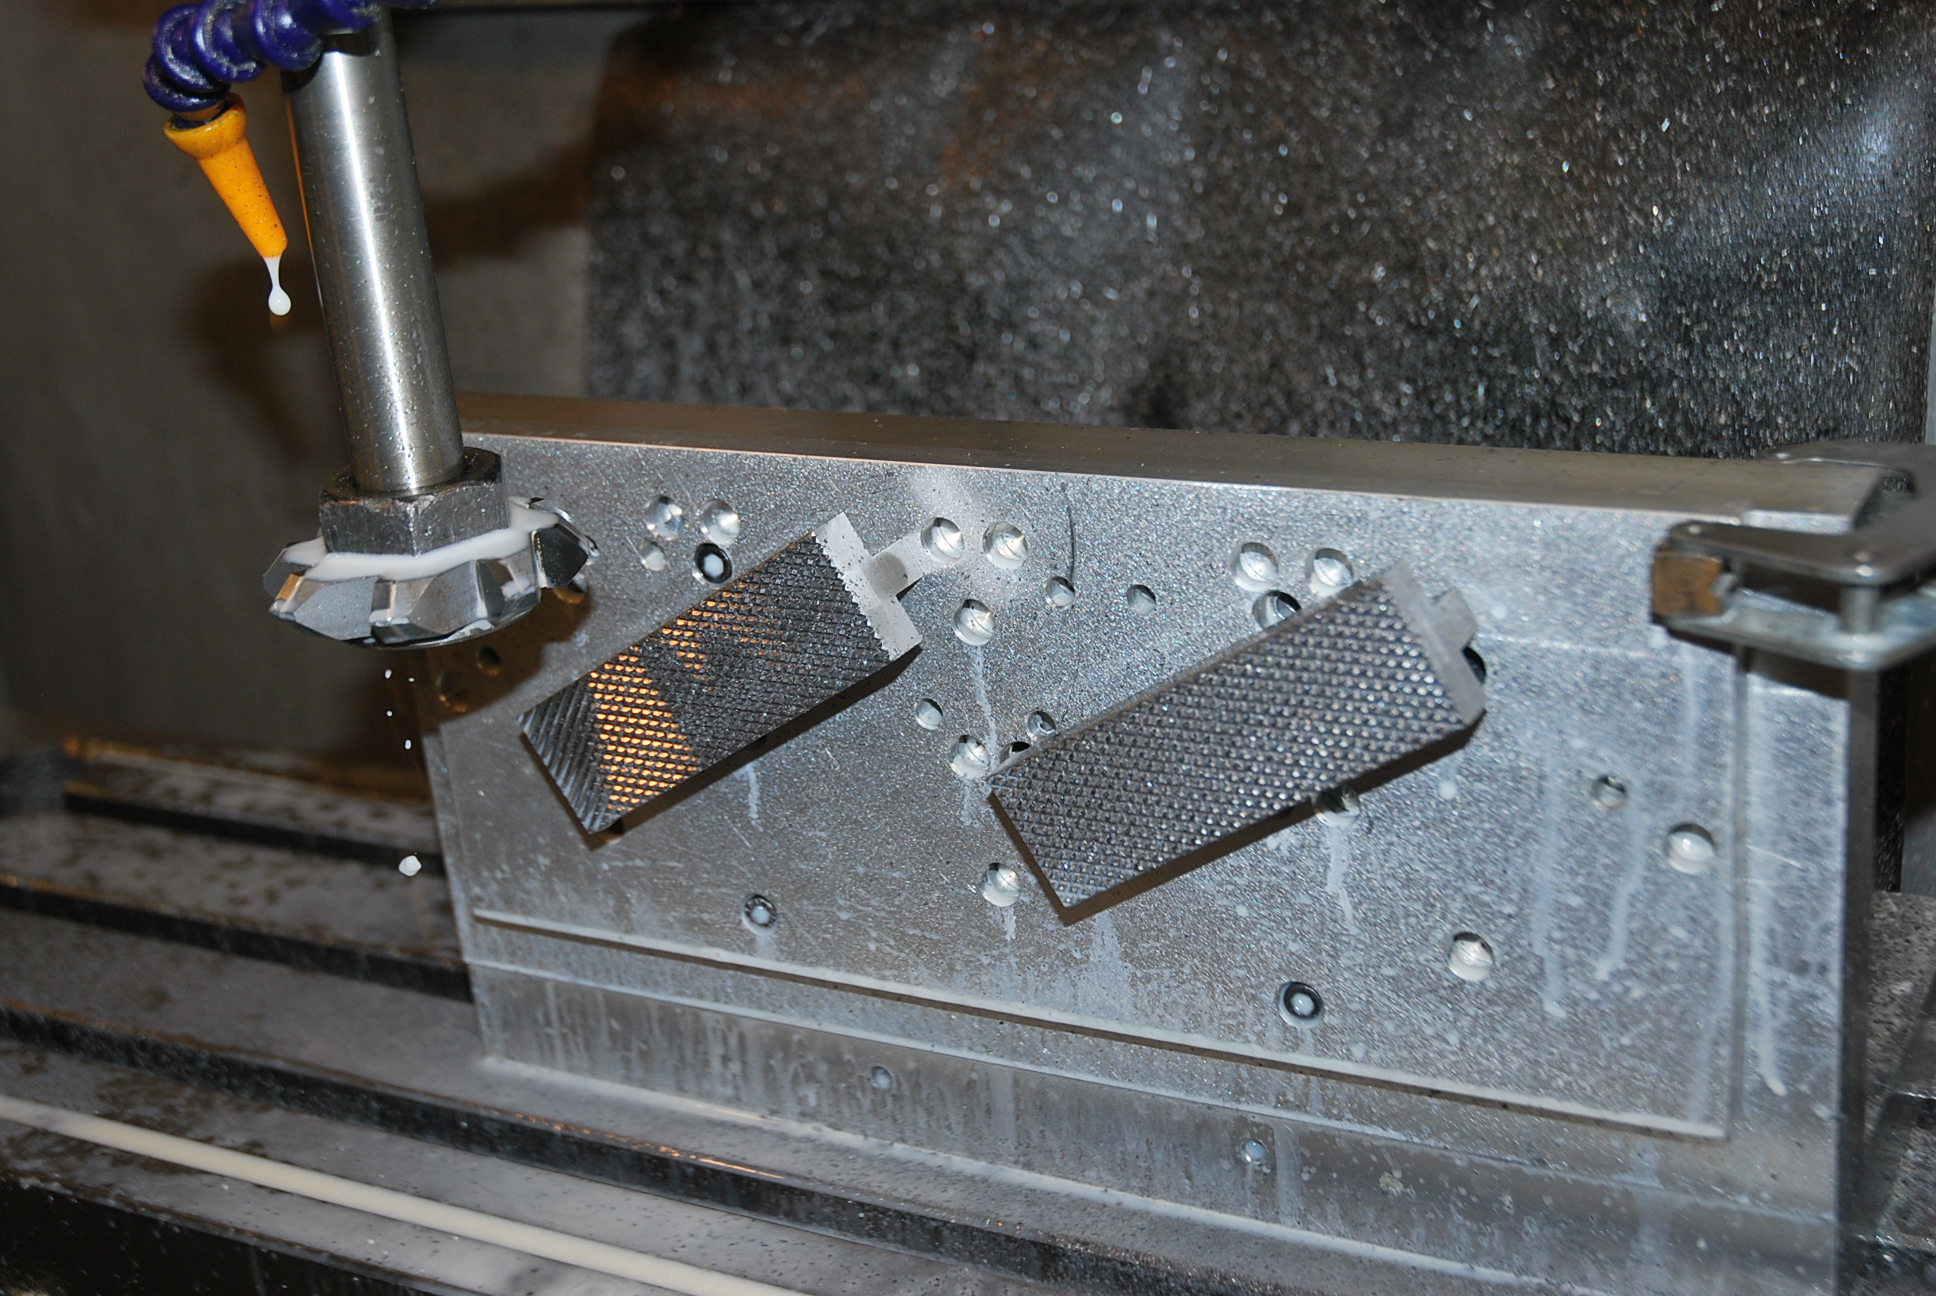
Cutting these serrations takes 40 minutes.
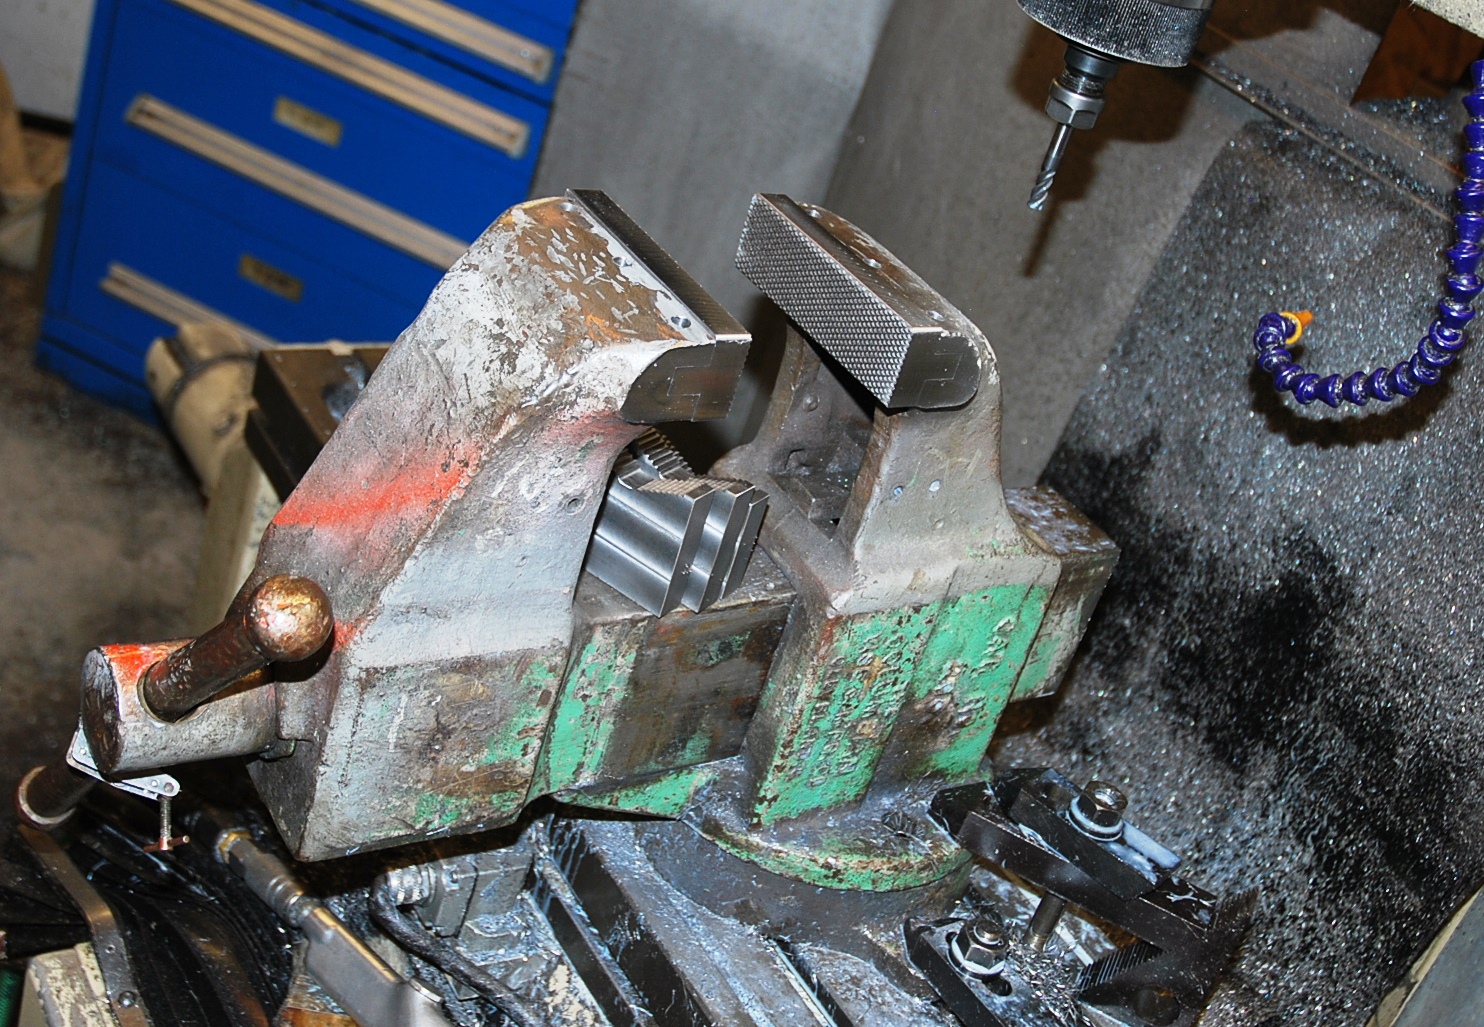
The jaws need to be drilled for the three pins. Now I have no idea how they used to sell these jaws with the holes already drilled and reamed. You have to hit the numbers real close like Jig Bore close to press fit the three soft pins. The Columbian vises that I fit jaws to had pin hole locations missed by more then .002. I pick each hole up with a indicator while the vise is clamped to my milling machine then drill and ream the holes. Missing the holes by a thousand or two means shearing the pins at assembly and possibly damaging the soft vise. So this made it difficult to sell these jaws since I had to ship the soft jaws to the owner and have them add the holes and then ship them back for heat treating. Yes you can drill and ream holes on a drill press but you have to know what you are doing. Just in case you want to try it your self then clamp the vise in your drill press. Pilot the hole with the finished sized drill bit, drill enough to mark the center then change drill bits to a size 1/64th under-size, drill through then follow up with the reamer. Mark the jaws before heat treating. I like to heat treat my A2 steel jaws to 54/56 Rockwell.
Good luck. Kevin
