Bench vise handles get abused almost as much as the jaws. When it is time for a new handle, you may have an idea how you want to do it yourself. I want to share the steps I use for building handles. My way is not the only way, it’s just my way. Things to consider are whether the spindle needs any work, which type of steel to use, and the method of knob installation.
The first area I look at is the spindle handle hole. If the hole is worn from the handle sliding for many years of use, then I consider machining out the hole to the next larger size.
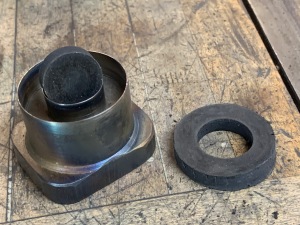
The picture shows a ratchet spindle off a Prentiss that is pretty worn on the sides. It shows that a smaller handle was used and it wore out the edges.

It is tricky locating the hole by hand, but with a top reading indicator in my CNC, I can find the center and also align the hole straight up and down. If you miss getting the spindle straight up and down you will not clean up the hole. I like leaving .015 clearance for the handle bar.
Next, I begin work on the handle itself. I like using high-strength 1144 carbon steel from McMaster Carr. This stuff is easy to machine but also very strong. It is a little springy, and actually very difficult to bend. If you do bend this stuff, then you are using way too much pressure on your vise.

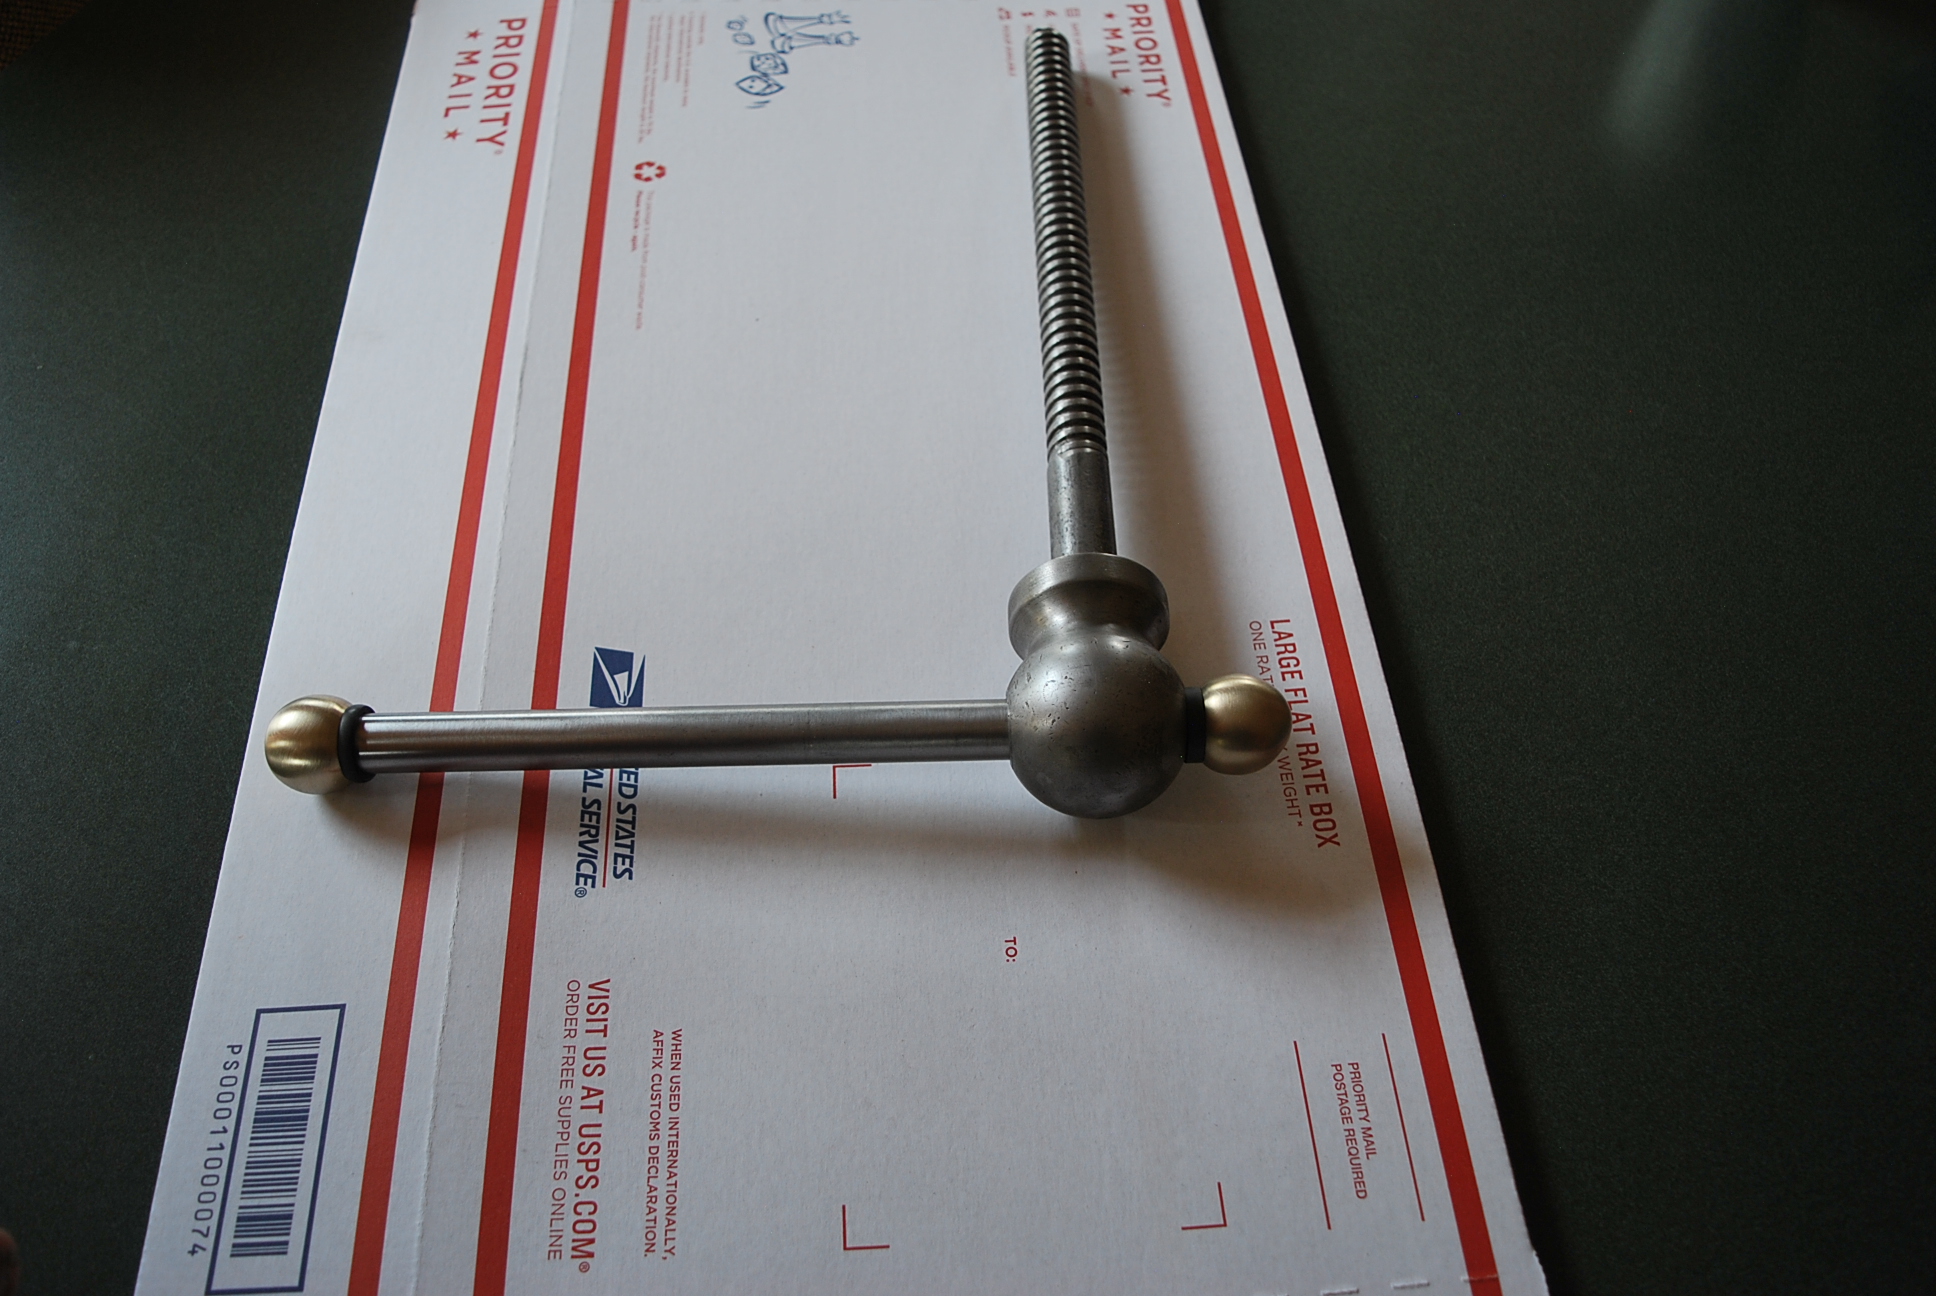
The handle is turned with a smaller diameter on the ends. I like a 3/8″ diameter for any knob under 1″ knob size, 7/16″ diameter for knobs under 1-3/8″, and 1/2 to 5/8 inch for anything bigger then 1-1/2 diameter. I also leave at least a 1/4″ extra for peening.

I studied handles from all the USA vise companies, and determined the most common method for peening the knobs on. I like to leave around a 1/4″ of peen material beyond the knob. Then I chamfer the knob pretty heavily for the peen material to fill. Another quicker method is to weld the knobs on. If I were in a hurry, I would choose TIG with no filler.

Making the knob is pretty easy, especially if you have a metal lathe. I have found it is easier to cut steps in the ball before sanding the ball smooth. The steps are cut to the arc of the radius. When you file, sand or grind the steps down to the cut lines from the lathe bit cuts has disappeared.
Just a quick note. I have handles that are finished and on another blog for sale. Check it out. Just in case you need one quickly.
Once I rough the front radius, the back radius is easy to match. I built a holding fixture to grab the knobs and I have it extended beyond a safe distance from the lathe chuck. Each knob is drilled and reamed for a precision hole and the fixture is machined and threaded for a flat head cap screw. The knob is bolted tight and then easily worked into shape.


When it’s time to install the final knob then I use a 6″ vise with a square slider for the handle to rest while peening. I also use copper caps or a delrin pad to grab the handle without marring the finish. I also rest the finished handle on a piece of delrin, nylon or aluminum to save the finished knob from being damaged.
Next, I take my oxygen acetylene torch to heat the end before peening, I like to get it pretty red before hammering. I use a hammer that feels comfortable and easily swung. You do not need a big hammer because the red hot steel moves pretty easily. I like to keep the torch on the work the whole time while I am hammering, since this keeps the steel from oxidizing in the fits and the chamfer. I tend to pound straight down and move the steel close then hammer at about a 15 degree angle all the way around the knob to form the steel to the chamfer real tight .If you haven’t forged before, it’s just a matter of patiently pounding and shaping until it looks the way you like. Don’t rush. The pictures show the finished peening.


This is how I finish the knobs after they cool: First I rough grind the excess steel down with my 6 x 48 belt sander. Then I get closer with my 1″ wide ribbon sander. The rest is hand work on the bench. Using a DA gets the scratches off pretty quickly. Using a smooth file and then going to 120 grit sand paper, then finishing up with the Scotch Brite pad that I supply with the order, will get the same finish that I gave on the first knob.


You can also peen on a bronze knob, just bury the peening below the ball end finish radius by adding a heavier chamfer. Peen as best as you can, I use a punch and move as much material as I can in the chamfered area then finish by TIG welding the rest with Silicon Bronze.

This is pretty much how I build handles. I also add a rubber bumper to most handles. I make these myself since I can not find a supplier that carries the ones I like. Here is a pic of the bumper dies I built and how I use the die in making bumpers. I added a drawing of a cut away view but you will have to come up with a way to rotate it while cutting the rubber. Good luck and have fun making your new handle.


Do you have replacement lead screws? It’s .875, with about .160 lead. 18”.
Sorry Vernon but I do not make lead screws. Everything I sell I fabricate. Kevin Scott
I just bought a vintage vise that is missing the handle and screw shaft and the piece that the screw would go through to move the vise apart. Can you help
Hi Shawn, Sorry but that is a assembly that you would need to purchase from Wilton. I hope they have it, you must figure out what vise you have. Good Luck.
Kevin Scott
Hello Kevin,going to need a new handle for a 1950 Wilton 9400 bullet vise can you help,if so send info
Sorry Randy, I only make handles for my vises, I wrote the blog so you can see how I make mine and where to get the steel material. Kevin
I need one 30 mm ball with 11 mm opening for my Wilton Bullet vise handle. Can you make one for me and at what price? I am in NYC zip 11358… Please let me know and thank you!
—Peter
Hey I have a Prentiss 21 vise that I need a new handle for. Can I order one from you?
No I am sorry but I am retired and sold my machine shop.
Thank for the EXCELLENT Information and Presentation… everything is cerrtainly appreciated. Mike Shebesta, Cincinnati. BTW” What is the specs for the rubber material to make the pinch stoppers?
Hi Mike
I buy mine from McMaster Carr and it is called “Multipurpose Neoprene Rubber Strip”. 1/4 thick with a 70 Durometer hardness. I built dies to cut the rings but you can make yours with a carbide burr for cutting the center hole the have the blank roughed out for the outside and finish it with a belt sander rolling it on a shaft. Pretty easy to make
Thanks for the info on the rubber bumper material.
Wanted to make some dyes for cutting the rubber. How did you make those?
Thx
Randy
Hi Randy, if you read my blog on Replacing your bench vise handle you will see my Bumper dies. I added a drawing of a cutaway view of how I made mine. Kevin
Thank you for posting all this information! It has been a great resource as I restore an Oswego 24B Sawyer Tool Co vise.
Nice post. Im from switzerland and know the swiss gressel vises very well. They have also full balls on there handle and they are not drilled tru the hole. They are pressed. I think this is a good option if you are not heating them.
I agree Nikola. Thanks for your note. Kevin Scott